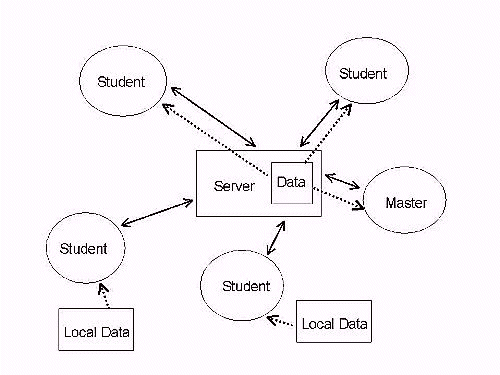
Solid arrows indicate the flow of commands; dashed arrows
indicate the flow of data
All commands to the software during a training session are sent via the Internet by having a single node on the Internet act as a server. Because of Internet security considerations, if the lesson is being taught in remote mode to any of the students (that is, they are downloading the image files during the lesson...as opposed to running in a local mode where they downloaded the image files ahead of time and are using them off their local disk), then the VISITview server must be running on the same machine from which the students are getting their files (html and image).
Solid arrows indicate the flow of commands; dashed arrows
indicate the flow of data
Running a VISITview server is quite simple. If you have downloaded the visitpack.zip file for use in a particular lesson, then you already have all the code you need. Open up a Command Prompt (in Windows), chdir to the directory where you unzipped the visitpack.zip file, and enter the command:
jre -cp ./ ViewServer
The server will start up (or complain that another copy is running already). And you are now ready to use VISITview. You will note that a fair amount of text output is produced by the server into the window where you started ViewServer from; this is mainly communications information and can be ignored.
For sessions that are being run completely in a local mode, the server can be on any machine. In fact, we intend to have two machines up all the time with VISITview servers running on them:
planck.ssec.wisc.edu
visit.cira.colostate.edu
Return to VISITview home page.